Red5之Hello World之视频播放之bug乱入
前几天看到个笑话, 内容大致是这样的:
某个程序员退休后,没有了频繁变更的需求, 没有了各种加班coding, 没有了无尽的bug fix,顿时觉得生活。。。。空虚寂寞冷--!刚好年少时十分爱好书法,果断花重金采购文房四宝。一日雅兴忽至, 果断研磨拟纸, 点檀香,颇有王羲之风范,又具颜真卿气势,定神片刻,泼墨挥毫,郑重地写下一行字:hello world!
好吧,看完上面的笑话,我们开始办正事啦,Red5之Hello world。
先附上环境:windows7 x64 + Java7 + Myeclipse10 + Red1.0
前置工作
Red5安装完成后,默认demo是不全的,首页(默认localhost:5080)上点击Install a ready-made application后进入安装界面:
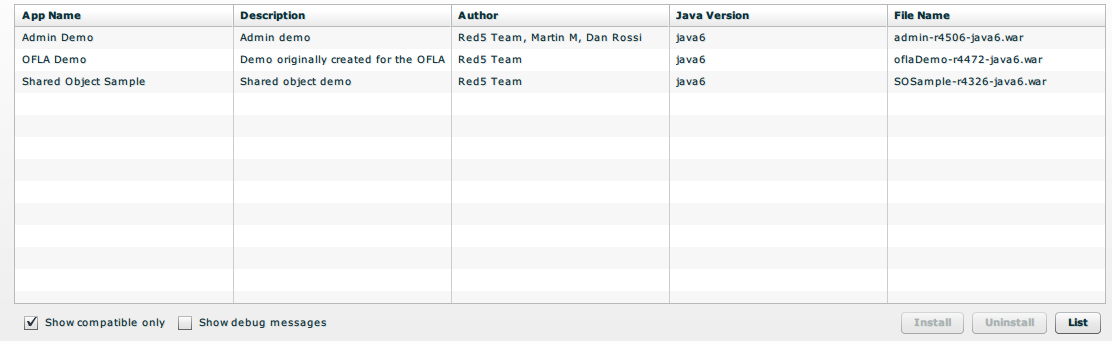
如果发现界面中没有条目,那哥们你应该是被河蟹了,翻**墙后再到此页面安装。
Red5自带了许多demo,这些demo的源代码同样可以得到。在demos页面(默认localhost:5080/demos/)的底部有:
The source code for the Flash parts of these demos is available at http://red5.googlecode.com/svn/flash/trunk/.
The source code for the Java parts of these demos is available at http://red5.googlecode.com/svn/java/example/trunk/.
需要的同学可以检出学习学习(同样需要翻墙),不过,学习是有代价的,这个后文再说。。。。
Red5 IDE Plugin这里有插件,不过只有Eclipse的,使用其他IDE的同学不用理会。博主表示Myeclipse无法安装成功(难道是人品太差→ →)。由于安装插件未果,只好使用原始的开发方式,新建一个java web项目搞起。
正文
在IDE中建好java web项目, 将Red5根目录下面的red5.jar文件以及
lib目录下的所有 jar包拷贝放到建立好的项目的WEB-INF/lib目录下。新建一个类继承
org.red5.server.adapter.ApplicationAdapter,重载一下:@Override public synchronized boolean connect(IConnection conn, IScope scope, Object[] params) { return true; } @Override public synchronized void disconnect(IConnection conn, IScope scope) { System.out.println("客户端断开!!!!!!!!!!!!!"); super.disconnect(conn, scope); }分别在客户端连接和断开时打印点东西满足一下程序员的恶趣味--!当然,这些方法到后期开发时非常有用,不过现在我们先就这样吧。
打开
web.xml文件,加入下面的代码:<context-param> <param-name>webAppRootKey</param-name> <param-value>/myRed</param-value> </context-param>同时,如果需要在管理界面进行监控的话,加入:
 <servlet>
     <servlet-name>gateway</servlet-name>
     <servlet-class>org.red5.server.net.servlet.AMFGatewayServlet</servlet-class>
     <load-on-startup>1</load-on-startup>
 </servlet>

 <servlet-mapping>
     <servlet-name>gateway</servlet-name>
     <url-pattern>/gateway</url-pattern>
 </servlet-mapping>
在
WEB-INF目录下新建一个red5-web.properties文件,内容为可配置的部分,解耦用,内容 先写:webapp.contextPath=/myRed webapp.virtualHosts=localhost, 127.0.0.1注意将两个值改成你的项目名称以及流媒体的地址, 然后相同目录下再建立一个
red5-web.xml,先来个轻量级的配置:<?xml version="1.0" encoding="UTF-8"?> <!DOCTYPE beans PUBLIC "-//SPRING//DTD BEAN//EN" "http://www.springframework.org/dtd/spring-beans.dtd"> <beans> <bean id="placeholderConfig" class="org.springframework.beans.factory.config.PropertyPlaceholderConfigurer"> <property name="location" value="/WEB-INF/red5-web.properties" /> </bean> <bean id="web.context" class="org.red5.server.Context" autowire="byType" /> <bean id="web.scope" class="org.red5.server.scope.WebScope" init-method="register"> <property name="server" ref="red5.server" /> <property name="parent" ref="global.scope" /> <property name="context" ref="web.context" /> <property name="handler" ref="web.handler" /> <property name="contextPath" value="${webapp.contextPath}" /> <property name="virtualHosts" value="${webapp.virtualHosts}" /> </bean> <bean id="web.handler" class="xxx.MyRedServer" singleton="true" /> </beans>主要注意一个问题,由于版本更新,需要将官方svn例子中
bean id="web.scope" class="org.red5.server.WebScope"更改为
bean id="web.scope" class="org.red5.server.scope.WebScope"否则,将报错:
java.lang.ClassNotFoundException: org.red5.server.WebScope
下面就是部署了,果断把项目编译后整个目录拷贝到Red5安装路径的
webapps目录下面,然后进入 你的项目的WEB-INF/lib目录,将里面的所有的jar包删除,否则报错:java.lang.RuntimeException: Failed to load webapplication context class. at org.red5.server.tomcat.TomcatLoader$1.run(TomcatLoader.java:579)
Caused by: java.lang.ClassCastException:
org.springframework.web.context.support.XmlWebApplicationContext cannot be cast to org.springframework.web.context.ConfigurableWebApplicationContext at org.red5.server.tomcat.TomcatLoader$1.run(TomcatLoader.java:577)到这,启动Red5,进入管理控制台(如果你安装了的话默认http://localhost:5080/admin/)可以看到你的项目已经部署成功。
进入项目的根目录创建
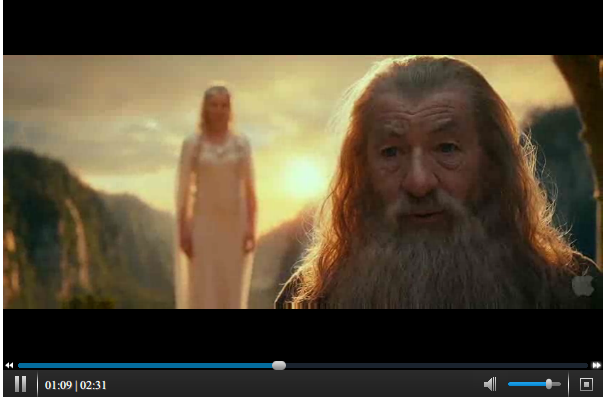
streams文件夹存放视频文件,格式支持参考Red5官网。下面就是找个播放器,然后链接到你的webapp播放视频了。在这里使用ML君推荐的ckplayer, 国人出品,功能健全。具体的配置信息参考ckplayer的官网, 这里不一一说明。博主配置好果断访问,结果视频一直无法播放,切到后台后看到茫茫多的错 误。。。
org.red5.server.service.ServiceInvoker Error executing call: Service: null Method: getScopes
而且如果你已经登陆了管理员控制台的话还把你提出来了。。这个是1.0版本的bug,具体信息可以参考AdminPanel does not work while publishing live stream,文章里面作者表示bug已经解决,下载附带链接中的最新版本即可。
重新安装下载的Red5 1.0.2版本,依然部署项目,打开页面,OK,Red5之Hello World视频流播 放搞定,截图留念: